FORK- 2014 40 FLOAT 26
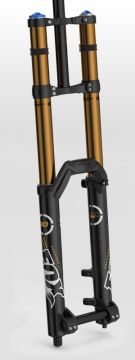
Travel
8.0 in./203mm
Features/Adjustments
Factory FIT RC2; 203; Kashima Coated upper tubes, 1-1/8" straight steerer, rebound, low-speed compression, high-speed compression, air spring pressure.
Lower leg
20 thru axle system, post style disc brake mounting
Spring
Air
Riding style
Downhill
For general information and installation instructions click here »
Before You Ride
Make sure that your fork is ready to ride
- Check that your 20mm axle and pinch bolts are properly adjusted and tightened.
- Inspect the entire exterior of your fork. The fork should not be used if any of the exterior parts appear to be damaged. Contact your local dealer or FOX for further inspection and repair.
- Check your headset adjustment. If loose, adjust it accordingly to your bicycle manufacturer's recommendations.
- Check that all brake cables or hoses are properly fastened.
- Test the proper operation of your front and rear brakes on level ground.
- Before every race or ride, clean the outside of your fork with only mild soap and water, and wipe dry with a soft dry rag. Do not spray water directly into the seal/upper tube junction. Do not use a high pressure washer on your fork.
WARNING: FOX bicycle suspension products are designed only for bicycle applications as recommended by FOX. DO NOT use the FOX 40 fork on any throttle-equipped motorized vehicle. Misuse or incorrect application of FOX suspension products may void the warranty and further may result in suspension failure, which could result in property damage, SERIOUS BODILY INJURY OR DEATH.
Setting Fork Air Pressure
40 FLOAT maximum air pressure is 100psi
Sag should be set to 15 - 20% of total fork travel
- Unscrew the blue air cap on top of the left fork leg counter-clockwise to expose the schrader valve.

- Attach a FOX High Pressure Pump to the schrader valve.
- Pump your fork to the appropriate pressure as listed in the 'Suggested starting points for setting sag' table below, then remove the pump.
- Using your forks sag setting o-ring on the left upper tube (or temporarily install a zip tie to the upper tube), slide the o-ring (or zip tie) down against the fork dust wiper.

- Make sure your RC2 adjusters are in the open position (both fully counter-clockwise).
- Dressed to ride (including a filled hydration pack, if you use one), position your bike next to a wall or table to support yourself. Mount your bicycle. Assume your riding position for at least 10 seconds, allowing the suspension to fully settle. Make sure you distribute your weight evenly between the saddle, handlebars and pedals.
- While in your riding position, slide the o-ring (or zip tie) down against the fork dust wiper.
- Dismount your bike without bouncing, to avoid further moving the o-ring or zip tie. Measure the distance between the dust wiper and the o-ring or zip tie. This is your sag measurement. Suggested sag measurements are listed in the table below.
- Add or remove air pressure until your sag measurement is between 15-20% of your forks total travel.
- Repeat steps 2-8 and recheck sag measurement.
- When sag measurement is correct, screw the blue air cap on clockwise until snug.
| Suggested Starting Points for Setting Sag | ||
| Rider Weight lbs/kgs | 203mm | |
| ≤125 | ≤57 | 51psi |
| 125 - 135 | 57 - 61 | 54psi |
| 135 - 145 | 61 - 66 | 57psi |
| 145 - 155 | 66 - 70 | 60psi |
| 155 - 170 | 70 - 77 | 64psi |
| 170 - 185 | 77 - 84 | 68psi |
| 185 - 200 | 84 - 91 | 73psi |
| 200 - 215 | 91 - 98 | 77psi |
| 215 - 230 | 98 - 104 | 82psi |
| 230 - 245 | 104 - 111 | 86psi |
| 245-260 | 111 - 118 | 91psi |
| ≥260 | ≥118 | 95psi |
| Suggested Sag Measurements | ||
| Travel | 15% sag (Firm) | 20% sag (Plush) |
| 8.0 in./203mm | 1.2 in./31mm | 1.6 in./41mm |
The 2014 40 FLOAT uses a simple air chamber volume adjustment system as part of the air topcap assembly. By switching the position of internal spacers to change the location of the compression bulkhead on the shaft, nine different compression ratios are available. For instructions and information regarding changing your 2014 40 FLOAT compression ratio, please go to SERVICE - FORK- 2014 40 FLOAT- Changing the Air Spring Compression Ratio »
Adjusting Rebound
Rebound controls how fast the fork extends after compressing

The red rebound adjuster is located at the bottom of the right fork leg and is protected by a black cover. Rebound controls the rate of speed at which the fork extends after compressing. Turning the knob clockwise (in) slows down rebound; turning the knob counter-clockwise (out) speeds up rebound. Rebound damping should only be set after first setting your air pressure by measuring sag.
- Make sure your RC2 adjusters are in the open position (both fully counter-clockwise).
- Starting with the rebound adjuster fully open (counter-clockwise) push on the fork to compress it and feel its return speed.
- Increase rebound damping by turning the red rebound knob in clockwise until when tested, the fork returns quickly but does not top out.
Top out is felt when a fork fully extends too quickly and comes to an abrupt stop when it reaches full extension (you will hear/feel a small noise). Top out should be avoided through proper rebound setting.
Using the RC2 High and Low Speed Compression Adjusters
Independently Control High and Low Speed Compression
Adjusting your high and low speed compression setting controls how the fork feels as it's compressed through its travel under various types of hits. Use your high and low speed compression adjusters to tune the fork to meet your riding style and terrain.
Low-speed compression:

Low-speed compression damping controls how the fork feels when being compressed slowly. This adjustment is useful to control fork performance under rider weight shifts, brake dive, G-outs, and other slow inputs into. Turning your low-speed compression dial clockwise increases low-speed compression damping and will make your fork feel stiffer when being compressed slowly. Turning your low-speed compression dial counter-clockwise decreased compression damping and will make your fork feel softer when being compressed slowly.
High-speed compression:

High-speed compression damping controls how the fork feels when being compressed quickly. This adjustment is useful to control fork performance under bigger hits, landings, and square-edged bumps. Turning your hihg-speed compression dial clockwise increases high-speed compression damping and will make your fork feel stiffer when being compressed quickly. Turning your high-speed compression dial counter-clockwise decreases compression damping and will make your fork feel softer when being compressed quickly.
Using the Air Release Buttons
Make sure that your fork is running with the lowest friction possible

The Air Release Button at the rear of each fork leg allows the rider to equilize the air pressure between the inside of the fork lower leg and the atmosphere. This can be especially helpful at higher altitudes where the internal/external pressure differential can be its greatest.
- Make sure your fork is in an upright position and the exterior is clean of any dirt/debris.
- Always cover the Air Release Buttons with a rag before pressing to prevent any oil spray.
- Make sure to hold the buttons down for at least 5-10 seconds to allow for all air to be released.
Service Intervals
Make sure to properly maintain your fork
