SHOCK- 2015 All Air Shocks (FLOAT CTD/FLOAT X CTD)
Travel
FLOAT CTD: 5.50 x 1.00, 6.00 x 1.25, 6.50 x 1.50, 7.25 x 1.75, 7.50 x 2.00, 7.875 x 2.00, 7.875 x 2.25, 8.50 x 2.50.
FLOAT X CTD: 7.50 x 2.00, 7.875 x 2.00, 7.875 x 2.25, 8.50 x 2.50, 8.75 x 2.50, 9.50 x 3.00.
Features/Adjustments
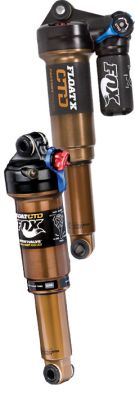
Factory FLOAT CTD w/Adj BV; Kashima Coated or anodized air sleeve and body, lever actuated Climb/Trail/Descend (3 position), Trail adjust range (1, 2, 3), rebound, air spring pressure.
Factory FLOAT CTD Remote BV; Kashima Coated or anodized air sleeve body, remote actuated Climb/Trail/Descend (3 position), rebound, air spring pressure.
Performance FLOAT CTD BV; Anodized air sleeve and body, lever actuated Climb/Trail/Descend (3 position), rebound, air spring pressure.
Evolution FLOAT CTD Remote; Anodized air sleeve and body, remote actuated Climb/Trail/Descend (3 position), rebound, air spring pressure.
Evolution FLOAT CTD; Anodized air sleeve and body, lever actuated Climb/Trail/Descend (3 position), rebound, air spring pressure.
Factory FLOAT X CTD w/Adj; Kashima Coated or anodized air sleeve and body, lever actuated Climb/Trail/Descend (3 position), Trail adjust range (1, 2, 3), rebound, air spring pressure.
Factory FLOAT X CTD Remote; Kashima Coated or anodized air sleeve and body, remote actuated Climb/Trail/Descend (3 position), rebound, air spring pressure.
Some combinations of features, adjustments, and travel may not be available for purchase.
Spring
Air
Riding style
XC, Trail, AM, Freeride
Installing Your Shock
Check for clearance before riding.
If you are installing your shock on a bike for which the shock was not original equipment, follow the steps below to ensure proper clearance before riding.
- Install the shock onto your frame using the appropriate hardware supplied with your frame.
- Remove the air cap and let all air out of the main air chamber.
- Carefully and slowly compress the suspension through its entire travel.
- Check that no part of your shock contacts any portion of your frame or linkage as it cycles through its travel.
- Pressurize your main air chamber to between 50-300psi to prepare to set sag as described in the "Setting Shock Air Pressure" section below.
Before You Ride
Make sure that your shock is ready to ride
- Clean the outside of your shock with mild soap and water and wipe dry with a soft rag.
- Do not use any solvents or de-greasers as these products can damage the shock's exterior finish.
- Do not use a high pressure washer or spray water directly at the seal/shock body junction.
- Inspect the exterior of your shock. The shock should not be used if any of the exterior parts appear to be damaged
- Contact your local FOX dealer or FOX directly for further inspection or repair.
- Make sure that your quick-release levers (or thru-axles) are properly adjusted and tightened.
- Check your headset adjustment. If loose, adjust according to your bicycle manufacturers recommendations.
- Check that all brake cables or hoses are properly fastened.
- Test the proper operation of your front and rear brakes on level ground.
Setting Shock Air Pressure
FLOAT CTD and FLOAT X CTD shocks have a maximum pressure of 300psi
Sag should be set to 15 -€“ 20% of total shock travel
- Unscrew the black air cap to expose the schrader valve.


- Slide your shocks sag setting o-ring up against the shock dust wiper.

- Rotate the CTD lever to the Descend mode (fully counter-clockwise).
- If you have a FLOAT CTD Remote shock, click the black release lever once to set the shock to Descend mode.
- Dressed to ride (including a filled hydration pack, if you use one), position your bike next to a wall or table to support yourself. Mount your bicycle. Assume your riding position for at least 10 seconds, allowing the suspension to fully settle. Make sure you distribute your weight evenly between the saddle, handlebars and pedals.
- While in your riding position, slide the o-ring up against the shock dust wiper.
- Dismount your bike without bouncing, to avoid further moving the o-ring. Measure the distance between the dust wiper and the o-ring. This is your sag measurement. Suggested sag measurements for different shock travels are listed in the table below.
- Add or remove air pressure until your sag measurement is between 15-20% of your shocks total travel.
- Repeat steps 2-6 and recheck sag measurement.
- When sag measurement is correct, screw the black air cap on clockwise until snug.
| Suggested Sag Measurements | ||
| Shock Travel | 15% Sag (Firm) | 20% Sag (Plush) |
| 1.00 in./25mm | 0.15 in./3.7mm | 0.20 in./5.0mm |
| 1.25 in./32mm | 0.19 in./4.8mm | 0.25 in./6.4mm |
| 1.50 in./38mm | 0.23 in./5.7mm | 0.30 in./7.6mm |
| 1.75 in./44mm | 0.27 in./6.6mm | 0.35 in./8.8mm |
| 2.00 in./51mm | 0.30 in./7.6mm | 0.40 in./10.2mm |
| 2.25 in./57mm | 0.34 in./8.5mm | 0.45 in./11.4mm |
| 2.50 in./64mm | 0.40 in./9.6mm | 0.50 in./12.8mm |
| 3.00 in./76mm | 0.45 in./11.4mm | 0.60 in./15.2mm |
Adjusting Rebound
Rebound controls how fast the shock extends after compressing
FLOAT CTD: Turning the red rebound knob clockwise (in) slows down rebound, turning the red rebound knob counter-clockwise (out) speeds up rebound.

FLOAT X CTD: The red rebound knob is located in the center of the eyelet assembly. In some cases you might need to utilize a small tool (recommended tool is a 2mm hex wrench) to help you turn the red rebound knob. Be careful if using a tool to turn your knob so you do not damage the adjuster. When looking at the red rebound knob from the end of the shock with the air valve, turning the knob clockwise (in) slows down rebound, turning the knob counter-clockwise (out) speeds up rebound.


Rebound controls the rate of speed at which the shock extends after compressing. Rebound damping should only be set after first setting your air pressure by measuring sag.
- Make sure your CTD adjuster is set in Descend mode (fully counter-clockwise).
- Starting with the rebound adjuster in the fully open position (counter-clockwise) push down on the saddle to compress the shock and feel its return speed.
- Increase rebound damping by turning the red rebound knob clockwise (when viewed from the end of the shock with the air valve) until when tested, the shock returns quickly but does not top out.
Top out is felt when a shock fully extends too quickly and comes to an abrupt stop when it reaches full extension (you will hear/feel a small noise). Top out should be avoided through proper rebound setting.
Climb, Trail, Descend
Easy on-the-fly adjustments for unprecedented control and performance
The blue CTD lever lets you to switch between the Climb, Trail, and Descend modes. Each mode is optimized for each specific type of terrain, providing exceptional performance and riding enjoyment with your shock. CTD allows for complete rider control as one can experiment using different modes on various different types of terrain.
Climb Mode:


Rotate the blue CTD lever fully clockwise to set the shock in Climb mode. Climb mode is a very firm low-speed compression setting (not designed to be a solid lockout). This setting is most useful for climbing and sprinting.
Trail Mode:


Rotate the blue CTD lever to the middle setting to set the shock in Trail mode. Trail mode offers less compression damping than Climb mode. Use this setting when pedaling on undulating terrain, and for preventing excessive travel in technical riding situations (such as low-speed drops). Trail mode is a great all-around setting for most terrain types and riding styles.
Descend Mode:


Rotate the blue CTD lever fully counter-clockwise to set the shock to Descend mode. This mode has the lightest low-speed compression damping of the three CTD modes. Descend mode offers the most plush ride to ensure optimal traction over varied terrain.
Adjusting Trail Mode
FLOAT CTD w/Adj models allow for added fine tuning


FLOAT CTD w/Adj and FLOAT X CTD w/Adj model shocks feature a three-position Trail Adjust control that regulates low-speed compression damping only in Trail mode. 1 is the softest setting, 2 is the medium setting, and 3 is the firmest setting. To adjust Trail mode, first gently pull out on the black Trail adjust knob and turn it, lining up the arrow with your desired Trail mode setting number.
Trail adjustments (1, 2, 3) only function in Trail mode.
Using the CTD Remote
Easy on-the-fly adjustments for unprecedented control and performance


The CTD Remote lets you to switch between the Climb, Trail, and Descend modes while riding. Each mode is optimized for a specific type of terrain, providing best performance and riding enjoyment. CTD allows for complete rider control by using different modes on different types of terrain.
Climb Mode:
- Push the silver lever down to its lowest position to set the fork in Climb mode.
Climb mode is a very firm low-speed compression setting (not designed to be a solid lockout). This setting is most useful for climbing and sprinting.
Trail Mode:
- From Climb mode, push the black release lever once and then push the silver lever down one click to the middle position to engage Trail mode.
- From Descend mode, push the silver lever down one click to the middle position to engage Trail mode.
Trail mode offers less compression damping than Climb mode. Use this setting when pedaling on undulating terrain, and for preventing excessive travel in technical riding situations (such as low-speed drops). Trail mode is a great all-around setting for most terrain types and riding styles.
Descend Mode:
- Push the black release lever in any setting to set the fork to Descend mode.
Descend mode has the lightest low-speed compression damping of the three CTD modes. Descend mode offers the most plush ride to ensure optimal traction over varied terrain.
NOTE: Actuate the release lever with the suspension unweighted for immediate changes between damping settings. Actuating the release lever with the suspension under load may cause a slight delay transitioning between damping modes.
Service Intervals
To best maintain the performance and durability of your product under normal use, FOX recommends that you have regular fork and shock maintenance performed according to the service intervals listed below.

*Suspension product will require more frequent servicing the harder they are worked. For those who ride lift-accessed DH, Park, or Extreme Freeride or in extremely wet/muddy or dry/dusty environmental conditions where trail debris is sprayed onto the fork or shock while on the trail, or e-mtb's, FOX encourages riders to perform maintenance earlier than recommended above as needed. If you hear, see, or feel something unusual, stop riding immediately and contact a FOX Authorized Service Center for proper servicing.
Air Sleeve Maintenance
The air seals inside FOX air shocks do a lot of work and should be replaced regularly in order to maintain optimal performance and prevent wear. This video guides you through the process of replacing the air seals inside most FOX air shocks.