![]()
![]()
![]()
![]()
![]()
![]()
![]()
![]()
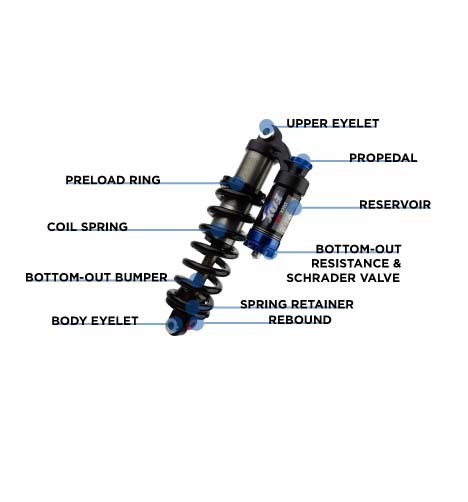
Installing Your Shock | General Maintenance | Before You Ride | Setting Sag | Changing Springs | Measuring Sag | Adjusting Rebound | ProPedal| Bottom-Out Resistance | Boost Valve | Service Intervals | Important Safety Information
If you are installing your shock on a bike in which the shock is not original equipment:
Some things to consider:
You can also view a Flash video on Setting Sag.
To set
If sag is lower than on the table, turn the preload ring counterclockwise. Always ensure that the spring is secure and does not freely move.
After the preload ring engages the spring,
turn the preload ring
If sag is higher than on the table, turn the preload ring clockwise no more than full two turns after the preload ring engages the spring.
If after the preload ring engages the spring and more than two full clockwise turns are needed to achieve proper sag, you will need to obtain a higher rate spring.
|
Shock Travel |
Recommended Sag |
|
2.00/50.8 |
.50/12.7 |
|
2.25/57.1 |
.56/14.2 |
|
2.50/63.5 |
.62/15.7 |
|
2.75/69.8 |
.69/17.5 |
|
3.00/76.2 |
.75/19.0 |
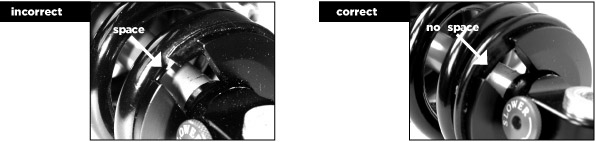
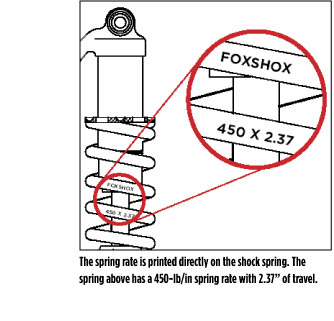
When placing the spring back on the shock body, it is important that the spring is correctly oriented. Essentially, the space in the spring retainer should rest on the flat part of the spring, and not on the segment of the spring where it starts to coil back under itself. Rotate the spring or spring retainer until the correct orientation is achieved.
An improperly oriented spring can fail prematurely, causing loss of control of the bicycle, which can result in serious or fatal injuries. The pictures below demonstrate correct and incorrect spring orientation. Correct spring orientation applies to all FOX Racing Shox rear shocks that utilize coil springs:
Rebound controls the rate at which your shock returns after it has been compressed. The proper rebound setting is a personal preference, and changes with rider weight, riding style and conditions. A rule of thumb is that rebound should be as fast as possible without kicking back and pushing the rider off the saddle.
The rebound knob has approximately 15 clicks of adjustment.
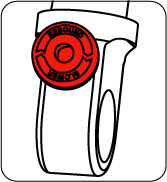
For slower rebound, turn the red adjuster knob clockwise.
For faster rebound, turn the red adjuster knob counterclockwise.
The ProPedal adjustment knob allows the rider to adjust the amount of ProPedal damping. ProPedal damping affects the initial part of the compression stroke and is designed to control pedal-induced suspension bob. Since suspension designs vary, not all bicycles require the same degree of ProPedal damping.
There are 15 clicks of adjustment.
For lighter ProPedal damping, rotate the ProPedal knob counterclockwise.
For increased ProPedal damping, rotate the ProPedal knob clockwise.
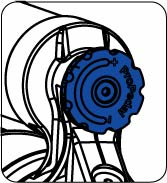
Bottom-out resistance affects the final part of the compression stroke. The knob can be turned with a 4 mm hex key inserted into one of the holes around the perimeter. Do not use any other tool to turn the knob; use a 4 mm (or 5/32") hex key only!
Turn the knob all the way clockwise for the most bottom-out resistance and counter-clockwise for the least. There are three (3) rotations of adjustment and three (3) corresponding adjustment indicator lines on the reservoir.
For more bottom-out resistance, turn the knob clockwise.
For less bottom-out resistance, turn the knob counterclockwise.
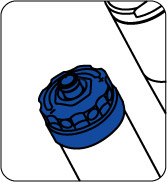

If the knob feels gritty during rotation, set the knob to maximum volume (full counterclockwise) and then use a 2 mm (or 5/64") hex key to loosen the set screws in the perimeter holes and remove the knob. Clean the knob thoroughly. Lightly grease then re-install the knob.
The Boost Valve creates a position-sensitive damping scheme that allows for a seamless transition from efficient ProPedal to square-edge bump absorption to a bottomless end-of-stroke feel. The Boost Valve also decouples the ProPedal and bottom-out adjustments, enabling ProPedal platform adjustments to be made without affecting the changes made to the bottom-out adjustment.
The Boost Valve is not adjusted directly. Instead, its behavior and performance characteristics are influenced by the air pressure setting in the reservoir and by adjusting the ProPedal knob.
For a firmer ride, add 10 - 15 pounds of air pressure (to a maximum of 200 PSI).
For a softer ride, decrease the shock's air pressure 10 - 15 pounds by using the pump's bleed valve (to a minimum of 125 PSI).
Ride your bike and verify the settings before repeating the procedure.
Never ride your bike with more than 200 PSI or less than
125 PSI in the reservoir air chamber.
Doing so can damage your shock and require repairs that are NOT covered
under warranty.
Certain aspects of the Boost Valve can influence the ProPedal adjustment:
If the ProPedal adjustment knob is fully counterclockwise (lightest ProPedal damping position) and the compression damping is still too strong, attach a shock pump to the Schrader valve on the reservoir and reduce the pressure 10 - 15 psi. Repeat to achieve the desired compression damping.
If there is not enough compression damping with the ProPedal knob fully clockwise, add 10 - 15 psi to the Boost Valve until desired compression damping is achieved.
eng046
![]()
![]()
Bushing Technology & Inspection | Seals & Foam Rings | Seal Cleaning | Control Direction | Oil Volumes | Structural Inspection | Dropout Thickness Inspection | Torque Values| Unit Conversion | Suspension Tuning Tips | Using the Pump | Important Safety Information | Service Intervals | Contact FOX Service | Warranty Information