|
|
You can view a Flash video of the 32 mm New Fork Installation if you are installing the fork for the first time.
You can also view a Flash video of the 32 mm Replacement Fork Installation if you are replacing an existing fork.
Note: This installation procedure also applies to FOX F29 forks.
FOX Racing Shox highly recommends that a qualified bicycle technician install your FOX fork on your bicycle. Improperly installed forks are dangerous, and can cause loss of control and serious or fatal injuries. Read this section in its entirety before beginning the installation process of your FOX fork.
Note: If there is no old fork to measure by, cut the steerer to the proper length with the following procedure:
WARNING: If the steerer has any nicks or gouges, the crown/steerer/upper tube assembly must be replaced. A nick or gouge can cause the steerer to fail prematurely, and cause loss of control of the bicycle and serious or fatal injuries.
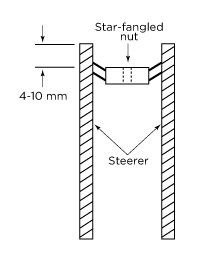
Note: The total height of spacers used on a FOX steerer tube should never exceed 30 mm.
Linear-pull brakes (i.e., V-brakes) can be used on FOX 32 mm forks equipped with brake posts. Install and adjust linear-pull brakes according to the manufacturer’s instructions. Test brakes for proper operation on flat land. Since FOX 32 mm forks use a hangerless lower leg design, cantilever style brakes cannot be used.
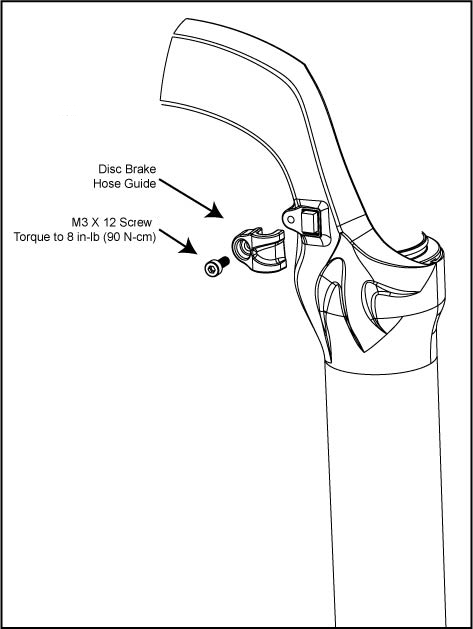
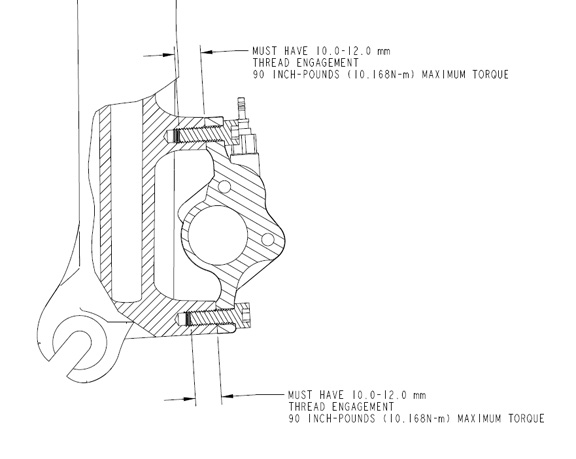
Disc brakes with 160 – 203 mm rotors can be used on FOX 32 mm forks. Do not use rotors larger than 203 mm. Install disc brakes and torque all fasteners according to manufacturer’s specifications.
CAUTION: IMPORTANT: the disc brake caliper mounting bolts must have 10-12 mm of thread engagement with the fork. Be sure these mounting bolts are torque wrench tightened to the manufacturer’s specification. In any case, the disc brake caliper mounting bolt tightening torque level must never exceed 90 in-lb.
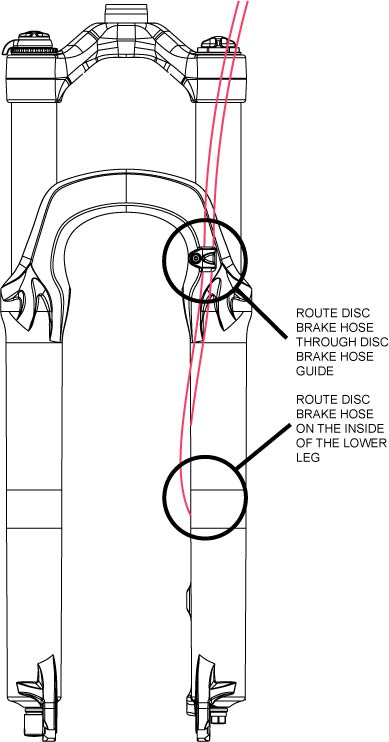
Install, route and check that all cables or hydraulic hoses are securely fastened to the lower leg and will not move during compression of the fork. It is recommended that new disc brake pads be installed to ensure proper alignment and to minimize drag. Test brakes for proper operation on flat land.
|
|
CAUTION: Torque calipers to brake manufacturer's specifications.
FOX 32 mm forks will accept tire sizes up to 2.40 inches wide (e.g., WTB MotoRaptor 55/60, 26 x 2.40). Any tire larger than 26 x 2.30 must be checked for clearance using the following method.
With the tire installed and inflated on the rim, measure the following three dimensions:
Maximum Peak Tire Diameter = 686 mm = 27.00 inch
Maximum Edge Tire Diameter = 652 mm = 25.67 inch
Maximum Tire Width = 61 mm = 2.40 inch
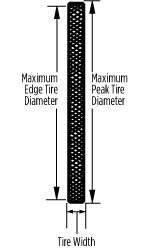
FOX F29 forks will accept tire sizes up to 2.30 inches wide (e.g., WTB MotoRaptor 55/60, 26 x 2.30). Any tire larger than 26 x 2.20 must be checked for clearance using the following method.
With the tire installed and in?ated on the rim, measure the following three dimensions:
Maximum Peak Tire Diameter = 744 mm = 29.29 inch
Maximum Edge Tire Diameter = 713 mm = 28.07 inch
Maximum Tire Width = 58.5 mm = 2.30 inch
WARNING: Do not use a tire if any measurement exceeds the maximum dimensions shown above. Using larger tires is not recommended and can cause serious or fatal injuries.
![]()
![]()
Bushing Technology & Inspection | Seals & Foam Rings | Control Direction | Oil Volumes | Structural Inspection | Dropout Thickness Inspection | Torque Values | Unit Conversion | Suspension Tuning Tips | Using the Pump | Important Safety Information | Service Intervals | Contact FOX Service | Warranty Information | FOXHelp Service Web Site
Copyright © 2010
FOX Factory Inc.